

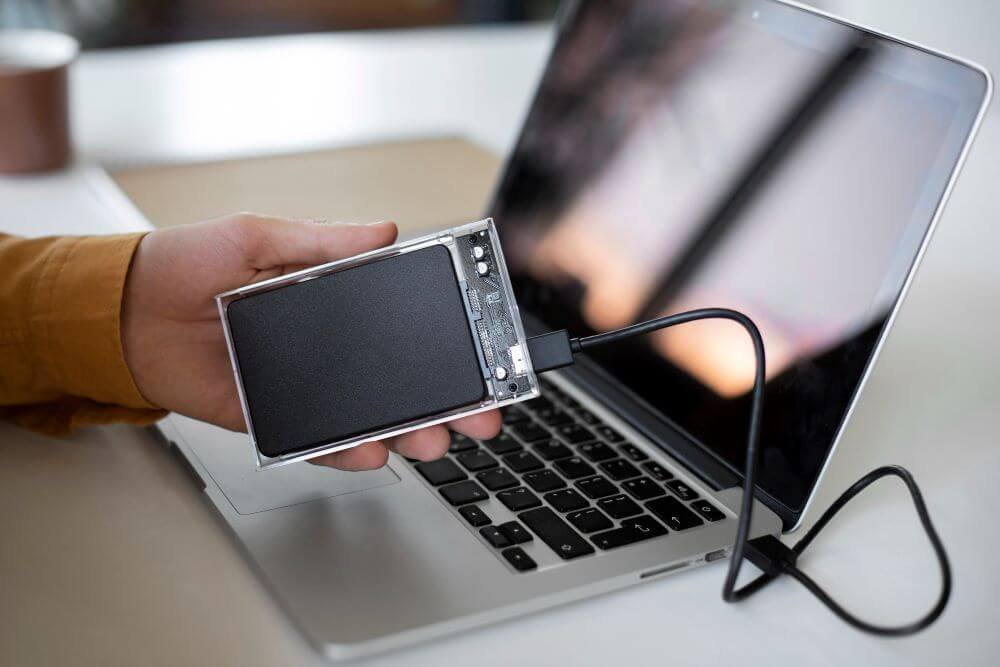
External hard drives are among the widely used storage devices, mainly known for creating backups, adding storage to your device, and transferring/storing large amounts of data. However, sometimes you may encounter a frustrating issue on your Mac – when the external hard drive fails to show up. This problem can occur due to several reasons, ranging from hardware issues or software conflicts to connection problems.
In this guide, we will discuss different methods on how to fix an external hard drive not showing up on Mac. Additionally, we’ll cover a quick and easy way to recover files from an external hard drive using free Mac data recovery software. Let’s get started!
Why Your External Hard Drive Is Not Showing Up on Mac?
Before diving into the fixes to resolve the issue, it’s important to find the exact reason why this happens. Some main causes for the same include:
- Faulty or Loose Connection: One of the main reasons why your Mac fails to recognise the external hard drive is a damaged or loosely connected USB cable or port.
- Drive Not Mounted: If your Mac detects a drive but fails to mount it automatically, this makes your hard drive not appear.
- Incompatible File Systems: Macs support HFS+, APFS, FAT32, and exFAT, but if your external drive is formatted in NTFS or other formats, it may not show up.
- Outdated or Corrupt Drivers: Although macOS generally doesn’t require drivers for external drives, software conflicts can cause issues.
- Drive Not Initialised or Corrupted: The drive’s partition map or file system may be corrupted, preventing it from being recognised.
Quick Methods to Fix External Hard Drive Not Showing Up on Mac
Now that you are familiar with the reasons why your external hard drive fails to show up on your Mac, let’s explore some quick and effective fixes. Just go with the following methods one by one to troubleshoot and resolve issues on your own:
Method 01: Check the Hardware Connection
Let’s start with the simplest approach first. It is good to check the physical connection before applying any other methods. For this:
- Connect your external hard drive to a different USB port. If it is still not showing up, then the problem might be with your port or cable. Try connecting the drive using a different cable.
- If you are using a powered external drive (with its own power supply), check and ensure that it’s properly plugged in and switched on.
If you fail to access the drivers even after a proper connection, move on to the next troubleshooting.
Method 02: Use Disk Utility to Locate the Drive
macOS offers a built-in Disk Utility tool, which you can use to manage internal and external storage devices. It allows you to mount, view, format, partition, and repair disks connected to your Macs. It also provides essential features to diagnose and fix disk-related errors.
If your external hard drive is not appearing on your Mac, follow the below steps to locate it in the Disk Utility tool:
- Launch Disk Utility (For this, go to Applications > Utilities > Disk Utility).
- Check if your external hard drive is appearing in the left sidebar.
- If it’s appearing but greyed out, select it and click Mount.
- If the drive is missing or fails to mount, click View in the top-left corner and select Show All Devices.
- Instances may occur when your driver is appearing but is unmounted or corrupted. In such a case, you can try the built-in First Aid utility:
- Select the drive and click the First Aid button.
- Run the repair tool and check if the issue is resolved.
Method 03: Reset NVRAM and SMC on Mac
Sometimes, resetting the Mac hardware settings can help fix connection issues with external hard drives, especially when the problem is related to software glitches or system configuration errors.
To reset NVRAM (non-volatile RAM):
- Shut down your Mac.
- Turn it ON while keeping the Option + Command + P + R keys pressed.
- Hold the keys for about 20 seconds, and release.
- The Mac will restart with reset NVRAM.
To Reset SMC (System Management Controller):
The exact steps to reset SMC on Mac depend on its modes (Intel-based or M1):
- For Intel Macs, shut down and disconnect all cables, then hold the power button for 10 seconds, release, and restart.
- For MacBooks with a T2 chip or Apple silicon Macs, the SMC resets automatically when you restart.
Once done, try reconnecting the external drives after the reset and check if they show up.
Method 04: Reformat the Drive (Warning: Data Loss)
Instances may occur when the above basic workarounds fail to fix the external hard drive not showing up on the Mac. If the issue seems complex and the driver fails to be mounted or accessed, reformatting can help you. Reformatting helps to reset the file system, removing any corrupted data structures that may be preventing the drive from working correctly on your Mac. To reformat the drive:
- Launch Disk Utility and select your external hard drive from the left sidebar.
- If you don’t see it, click View from the top-left and select Show All Devices.
- Now, click on the main name of the drive and tap Erase to open the format options.
- Give your drive a name and select the type of formatting you want to perform (APFS, Mac OS Extended, or exFAT).
- Once done, click the Erase button again and wait till the process completes.
Note: Go with the reformatting only after creating a proper backup of your files and folders.
What if Data Loss Occurs on External Hard Drive?
If your external hard drive is not showing up and it contains valuable data, it’s crucial to recover that data before attempting risky fixes like reformatting. Whether the files on your external hard drives are deleted due to accidental deletion, formatting issues, physical damage, improper disconnections, etc., you can use third-party free Mac data recovery software to restore them. Tools like Stellar Data Recovery Free for Mac are specially designed to help Mac users recover data from external drives that are not being detected.
This all-in-one free Mac data recovery software scans the drive thoroughly and retrieves lost or deleted data files safely, without causing any further damage. The free version of this software allows you to recover up to 1 GB of files at no cost. For restoring files larger than this, you can upgrade to the premium versions.
Here’s how to recover files from an external hard drive using the Stellar Data Recovery Free for Mac software:
Step 1: Download and install the Stellar Data Recovery Free software on your Mac. Also, connect your external hard drive to your Mac using a USB port or an appropriate connection cable.
Step 2: Launch the software and from the main interface, select the specific type of data you need to restore and click Next to continue.
Step 3: From the “Recover From” window, select the external hard drive from where you need to restore lost files and click on Scan.
Step 4: After the scan is completed, preview the recoverable files before recovery. Choose the files you want to recover and click “Recover” to save the recovered files to a safe location on your Mac.
Preventive Tips to Keep Your External Hard Drive Safe
Taking the right precautions can help you avoid such external hard drive issues from your end. In this section, we’ll go over essential steps and best practices you should follow to protect your external hard drive:
- Always Eject Properly: It is always better to properly eject your external hard drives instead of directly removing them from your PC.
- Regularly Back up Data: Creating backups of your important files ensures that you don’t lose them if the drive becomes inaccessible or corrupt.
- Keep macOS Updated: Latest macOS versions include bug fixes, security patches, and driver updates that improve how the system interacts with external devices.
Wrapping Up
Having an external hard drive that won’t show up on your Mac can be a stressful experience. However, some basic fixes like strengthening connections, using Disk Utility, resetting NVRAM and SMC, etc., can help you fix such issues on your Mac. Moreover, if you encounter data loss issues on the external hard drive on your Mac, use tools like Stellar Data Recovery Free for Mac to recover your files for free. With patience and the right tools, data recovery and troubleshooting become manageable even for non-technical users.


